You might have a bunch of MP4 files sitting on your computer and now need them in FLV format. Maybe you're working with older software that still prefers FLV, or you're uploading content to a system that doesn’t play well with MP4. Either way, converting MP4 to FLV is pretty straightforward.
There’s no need to get overwhelmed by all the tools out there. Some are basic, others offer deep customization, and a few run entirely online without needing to install anything. In the end, it comes down to what you're comfortable with. Whether you're tech-savvy or just need a quick fix, there’s a method that’ll work for you.
How to Convert MP4 to FLV?
Using VLC Media Player
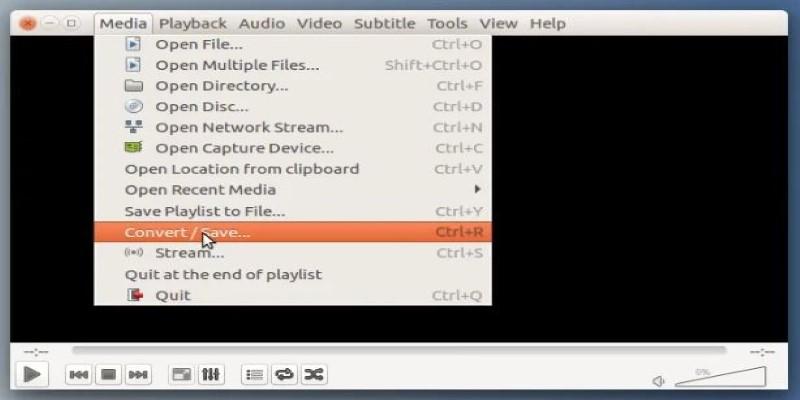
VLC is usually known as a video player, but it’s more than that. It can convert videos between formats with just a few clicks. It's free, runs on every major operating system, and doesn’t try to install extra software or show ads. To get started, open VLC and go to the “Media” menu, then choose “Convert/Save.” From there, add the MP4 file you want to convert. Once it’s added, click “Convert/Save” again at the bottom.
In the conversion window, select a profile that outputs to FLV. VLC doesn't include FLV in the default profiles, so you may need to create a custom one. That means picking the right codecs for video and audio, usually H.264 for video and MP3 for audio. After selecting your settings, enter a destination file name with the .flv extension and click "Start." The video will convert in real-time, so if it's a long video, expect to wait a bit.
Using HandBrake (With a Workaround)
HandBrake is a powerful video converter but doesn't support FLV as an output format directly. That said, it’s still useful in a two-step process. If your MP4 files are large, low quality, or inconsistent in resolution or bitrate, HandBrake can standardize them. You can compress or re-encode them using consistent settings, which makes the next step—converting to FLV—much smoother. To do this, open your MP4 file in HandBrake, pick a preset like “Fast 720p30” or “Very Fast 480p,” then export it again as MP4.
You’re essentially cleaning up or compressing the original video. Once that’s done, use VLC or FFmpeg to convert the new MP4 into FLV. This method takes longer but gives you more control over how your video turns out, especially if you’re working with multiple files or large sizes.
Using FFmpeg (Command Line Method)
If you’re okay using the command line, FFmpeg is a serious tool for video conversion. It’s fast, powerful, and extremely flexible. To convert an MP4 to FLV using FFmpeg, open Terminal or Command Prompt and type a command like this:
ffmpeg -i input.mp4 -c:v libx264 -f flv output.flv
This command takes the input MP4 file and converts it to FLV using the H.264 video codec. You can add other options—like adjusting bitrate (-b:v 1000k), changing resolution (-s 640x360), or setting audio codecs. FFmpeg doesn't show a progress bar, but it's quick and effective. If FFmpeg isn't installed, download it from the official site. Unzip the package and use it directly, or add it to your system path. It might seem intimidating at first, but after a few conversions, it feels natural.
Using an Online Converter
Online converters are perfect if you want a quick solution and don’t feel like installing anything. Sites like CloudConvert, Zamzar, or Convertio let you upload your MP4 file through a web browser and convert it to FLV in a few steps. You start by visiting the site, selecting your MP4 file, choosing FLV as the target format, and clicking the convert button. After processing, you’ll get a link to download the new FLV file.
These platforms usually support a decent range of formats and offer some light settings for quality or resolution. Just be aware that free users are often limited by file size or the number of conversions allowed per day. Speed depends on your internet connection, and upload and download times can slow you down with large files. Additionally, it's best to avoid uploading private or sensitive content, as your files are processed on a third-party server.
Using Freemake Video Converter
Freemake is a free tool for Windows users that offers a simple interface and supports FLV as an output format. Once installed, open the program and import your MP4 file by dragging it into the window. You’ll see an option at the bottom labeled “to FLV.” Click that, and a settings panel will open where you can pick quality, resolution, and encoding options.
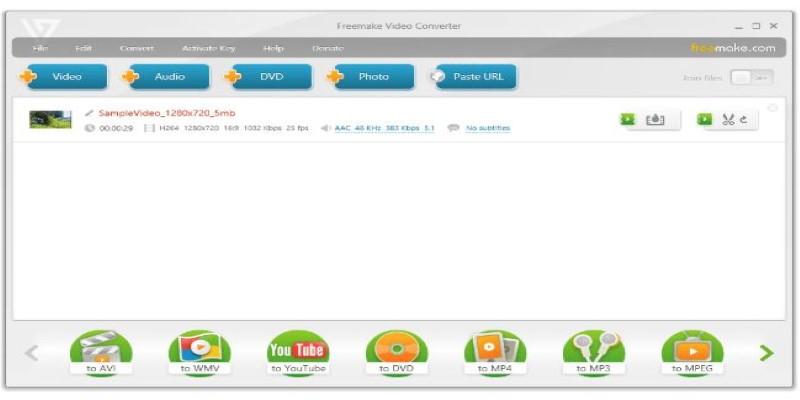
When you’re ready, hit the convert button. The free version does have some downsides—it places a watermark on your video and occasionally pushes upgrade prompts—but it works well for basic needs. If you’re converting videos that aren’t for public viewing or you don’t mind the watermark, it’s still a useful tool.
Using Any Video Converter (AVC)
Any Video Converter is available for both Windows and Mac and unlike some other free tools, it doesn't watermark your videos. After installing the app, open it and add your MP4 file using the "Add Video" button. From the format list, choose FLV as your output. You can adjust various settings like video size, frame rate, audio quality, or file path.
Once you’ve got your settings dialed in, click the convert button. AVC also supports batch processing, so if you’re working with several files at once, it’ll save you time. It’s not overloaded with features, but what it offers works smoothly and reliably. For most users, it strikes a good balance between simplicity and flexibility.
Conclusion
Converting MP4 to FLV can be simple if you choose the right method. VLC is easy and reliable, while FFmpeg offers more control for advanced users. Online converters work well for small tasks but aren’t great for large or private files. Freemake and AVC are solid desktop options, each with pros and cons. HandBrake helps prep large or inconsistent files before conversion. Once you’ve tried a few tools, the process feels routine. Pick what suits your needs and get it done quickly.